The recreation files- Edwardian skaters

Pinterest is a great way for me to get inspired to sew, and I came across this illustration of Edwardian skater outfits that would be amazing to recreate. I have a problem with wanting to do too many projects at once (heck I haven't even finished my civil war dress!), but I still like to research my patterns and supplies needed to create my next costume. The 2 dresses below are super cute, I love them both! I would want to create the one on the right first, the skirt pattern details are just adorable!

Looking at this fashion plate I can start to break down the costume. It looks like it could be a dress but it would be easier to create a skirt and top. For the top, I would use a vintage dress pattern but convert it into a top by just simply shortening it. This vintage pattern gives asymmetrical opening and I would add another button. Adding an underarm gusset would give myself more arm movement. 


The skirt would be made from a 1905 repro. pattern that can be easily shortened to the correct hem length as the one illustrated. The color and fabric of the skirt would be an italian heather grey woolThe wool would give a nice drape along with extra warmth. The edges of the skirt have thin lines which I interpret as multiple folds, like a descending accordion fold with each fold stitched down. For the waist band I would take the waist band pattern piece, increase the height and use the same fabric technique as the skirt edge, all reinforced with stiff interfacing. 
The detail on the skirt would be something I improvise and come up with on my own and sewn on top. 

Footwear would not be ice skates (impractical!) but I found some reproduction boots that would be a similar look.

For accessories, I would need to have gloves, a fur neck piece and hat. 
At first glance it appears that the jacket has the fur on the cuffs, but it would make more sense to have the fur on the gloves. For the neck scarf, this one would be perfect. 
I found a great ready made hat that had the same silhouette as the one in the illustration. I may remove the tie from the back of the hat and add black pom poms (I think that is whats on the hat) to tie it in with the skirt. 

Hopefully this outfit will be made in the future!

-Callie

I will wear red stockings to add some extra fun to this outfit.  


Civil war dress

My next project that I have currently brewing is a civil war dress! I am determined to finish this one, unlike the last on I created and left in to die in the "to finish" pile. When I created that dress, I got so caught up in making a historical costume and choosing different fabrics and trims that I lost focus on making it true to the era. (Just because a cotton fabric line says "civil war collection" doesn't mean that all of the fabric choices would be suitable for a dress.) Another element that I over looked was the fact that I didn't have proper undergarments that are essential in creating the appropriate silhouette. I was just going to wear a modern bra and a puffy petticoat, not realizing that a chemise, corset, drawers, hoop skirt and petticoats were necessary for my costume.

In created my civil war costume, I wanted to start on the essentials because they will change the fit of the dress and I want to do an excellent fitting job. The fit of a costume is super important to me. Since I have already made my chemise, the next item is to create my corset. I already created a corset mock up using a tutorial about pattern 9769 from simplicity.

(My dress form doesn't have wide enough shoulder to support the chemise, so I temporarily added some foam. The chemise fits me perfectly, just off the shoulders)

The only thing about that particular corset tutorial is that she shows the corset back cinched all the way, edges touching, which is historically incorrect. A properly fitting corset should have about 2 inches of space between the laces. That way you have more movement and it can fluctuate with your body.  
My experience in making ballet bodices has helped me a whole lot in understanding how a corset works and is assembled. My fabrics and supplies for my corset are waiting for me whenever I get a chance to sew, which unfortunately will be a while. Since I go to school 2 1/2 hours away from home, it is difficult to fit in a time to go home and sew. Even if I do get a weekend off, my time will be divided between my job as the costume designer and manager for a ballet studio and spending time with my family. 
Any way, so now onto the design I have in mind for my dress. I found the perfect pattern from abrahamslady.com. 

I have extra broad shoulders in proportion to my waist size, so I usually widen the shoulder width of a pattern. I will keep you updated on how that works out with this pattern. Since I went over the top crazy on my fabric choice and trims on my previous failed dress, a simpler design and fabric choice appealed to me. For my fabric I chose a green plaid from Joanns in the homespun collection.


 I wanted the feel of the dress to be more casual but I will use evergreen accents in a cuff detail and in contrasting buttons. 

-Callie

Altering a dress with a mesh back

I have been scouring the internet trying to find a tutorial on how to alter a formal dress with a mesh insert but came up empty handed. The item in need of help is a pageant dress that I will be wearing in spring 2014.


Before I get into the tutorial, you might relate to same situation I went through to find "the" dress. I knew that finding the perfectly fitting dress is nearly impossible, so I went shopping with an open mind.  Soon I discovered this dress and I love it!……..but it didn't fit the way I would like it to. Usually dresses will fit great in the top but not in the bottom and vise versa. So I tried on 2 different sizes and brought home the one that needed the top altered. The smaller size was too small in the hips. I had bought the dress at a shop close to school and over winter break I brought the dress home and was excited to get started on altering it. When I am unsure on how to alter something I just google it, but my search came up empty handed. I ended up texting my seamstress friend and she suggested taking up the excess in a single back seam and disguising my seam with some of the jewels. So I took the plunge (nervously) and I was quite pleased with how it turned out and it looks custom made.
So here are the before pictures


How I did it:
I tried on the dress and had my mom pinch and pin down the back of the mesh lining the pinned fabric up with the back seam of the skirt.
Once I took the dress off, I opened up the pinned fabric, marking each side with mini safety pins because regular pins would fall out.
( I removed more of the jewels after the picture was taken)
I found that the safety pins stayed in the mesh better than quilting pins. Next I then carefully removed all the jewels around the area where my seam would be. The jewels on the back of my dress were all connected so I tied off the existing thread and reenforced the jewel with some new thread.


Marking where the safety pins were with tailor chalk, I then removed the pins, folded right sides together, matching up each side based off my chalk marks.
I sewed the seam from top to bottom, extending the seam down into the skirt (about an inch or so) to give a smooth end of the seam.
Trimming the seam to about a quarter of an inch (not all of the way down) allowed me to open up the seam so it would lay flat. Sewing the jewels on top of the seam helped to camouflage the new seam.
By using this process I was able to take out 2.5 inches out of the bust and waist. Now I can't wait to wear it in the spring.

The after
 

-Callie


linked up with -
What I learned Wednesday
What we've accomplished Wednesday
Strut your stuff
A party

An exciting giveaway from American Duchess!

One of the historical blogs I follow, American Duchess, is having a pretty sweet giveaway. 


You can enter to win the first season of  BBC's "Upstairs/Downstairs"! Just hop on over to her blog and enter for a chance to win! Contest end on December 10 and winner is chosen on the 11th. Good luck!


My 1920s costume


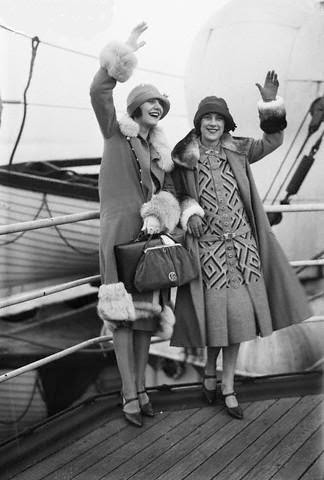
There was an event on October 30th on campus that was a halloween party. They encouraged everyone to dress up and to have fun. Even before I knew the exact date of the party, I already had in mind what I wanted to dress up as. As the title suggests, I dressed up as a flapper! I couldn't wait to get decked out in my 1920s finery! For some inspiration, I went over to Pinterest (Doesn't everyone?) and started a 1920s board. It got me in the flapper mood. I even helped my roommate get dressed up too! My costume craving was strong since I have been at college, I can't exactly bring my sewing machine or have time to make an elaborate creation. So I was just itching to get to work.
My costume consisted of a sheer beaded overlay with added fringe, a knit lace dress for underneath, a vintage fur collar, knee high navy socks, t strap shoes, a cloche hat from anthropologie, statement earrings and to top it off….some bright red lipstick. I wanted to be more historically accurate compared to the party city costume kits. 
One of the iconic styles of the 20's is the bobbed hair. To get my hair to be that short I separated my hair into pieces and looped them up and bobby pinned the ends. I pinned them near the top of my head or what ever made the ends of my hair even that was peaking out from under my hat. I was able to disguise the bobby pins under my hat. I also did a similar style for my roommate. I hid the bobby pins under her white headpiece. 
To costume my friend, we went to spirit halloween store and she picked out a bright red fringe dress. To tone down such bright red, I added some fishnet tights, pulled on some black gloves and she wore grey and black t strap heels. To balance the dark tones, I styled her hair  turban style hair wrap with a sparkly headpiece and for the finishing touch, a knotted strand of pearls was added. 
Even though we didn't win the costume contest, everyone loved the Gatsby themed costumes. 


Here are my inspirations from Pinterest. 


-Callie


Refocused

Hello Blogging world! Its been too long. When I started this blog, I felt the need to try and imitate other fashion blogs, get thousands of followers, etc. I though that would make me better as a person. In fact it did not. I became upset and depressed and lost my focus as a blogger. But what was my focus?
Seeing and reading fashion blogs was inspiring to put together my outfits and I wanted to imitate what I saw. But was that what I was really passionate about? I had not realized yet that fashion blogging wasn't necessarily for me. I began doing sewing costumes on the side for my sisters ballet studio. Slowly, I became more engrossed in that and fashion blogging didn't seem as important. Don't get me wrong, I still love reading those types of blogs, but reading and actually blogging about it is 2 different things. When I put together a post, I felt like there wasn't much to say, "I got this sweater while thrifting", "This outfit reminds me of my grandpas sweater", and etc. But if I talked about sewing or historical costumes/clothing I feel that there is more to talk and to learn about. 
Fast forward a few years, my sewing career has taken off, I finished up high school and now I am a freshman in college. Its weird that I haven't posted anything, but I haven't has anything to say until now. Now I am refocussing this blog into a sort of historical costume/fashion blog, costumes I am working on etc. The name of this blog now has a new meaning, instead of a menagerie, or collection, of fashion outfits, it now reflects the collection of historical clothing and costumes that i have either made/will discuss or have inspired me. 

Welcome back to the new Callie's Menagerie!

Callie


LinkWithin

Related Posts Plugin for WordPress, Blogger...